
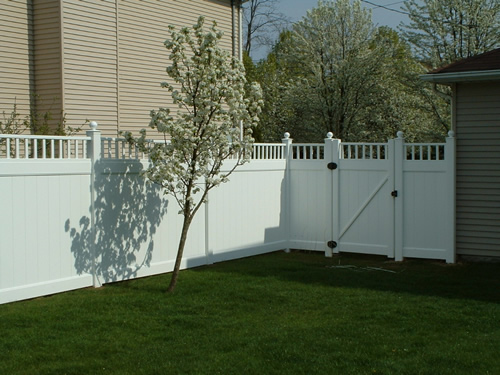
Can You Paint Vinyl Fencing ? DIY Guide For Beginners
Vinyl fences are a type of fencing made from polyvinyl chloride (PVC), a durable plastic material that is designed to withstand the elements. Unlike traditional wooden or metal fences, vinyl fences are engineered to be low maintenance, and resistant to rot, warping, and pests.
They come in various styles and colors, offering homeowners multiple options to match their aesthetic preferences and property needs.
There are several benefits to choosing vinyl fences for your property. First, they are extremely durable and designed to last for many years without significant wear and tear. This makes them a cost-effective option in the long run.
Second, vinyl fences require very little maintenance; they do not need to be painted or stained and can be easily cleaned with soap and water. However, as you will find out today, you could paint a vinyl fence or a wood fence if you want to personalize it. Many people do it with paint sprayer or find other ways to make their fences unique!
Additionally, vinyl fences are resistant to common issues like termites and weather damage, ensuring they stay looking great throughout the seasons.
Finally, the variety of styles available means you can find a design that complements your home, enhancing its curb appeal while providing privacy and security.
Understanding the Need for Painting
Vinyl fencing is often chosen for its durability, low maintenance, and aesthetic appeal. However, over time, even the most robust vinyl fences can show signs of wear and tear or may no longer suit your evolving style preferences. Understanding why you might want to paint your vinyl fence is the first step in deciding whether this DIY project is right for you.
One common reason for painting a vinyl fence is discoloration caused by exposure to the elements. Sunlight, rain, and dirt can all contribute to a faded or stained appearance. Painting can restore the fence’s original look or give it an entirely new color.
Another reason is to customize the fencing to better match the home’s exterior or garden design. Additionally, painting can serve as a protective layer against further weathering, helping to extend the life of the fence.
Before commencing a painting project, several factors should be considered to ensure a successful outcome. First, evaluate the condition of the vinyl; cracked or brittle sections may need repairs before painting can begin. Next, choose the appropriate paint type—vinyl-specific paints or those with strong adhesion properties are crucial for durability.
Weather conditions during and after the painting process are also critical; ideal conditions are dry and mild to allow the paint to properly cure. Lastly, be mindful of the time and effort required for preparation, such as cleaning and priming the surface, which ensures the paint adheres well and provides a smooth finish.
Preparing Your Fence for Painting
Cleaning the Surface
Before you begin painting your vinyl fence, it’s crucial to clean the surface thoroughly. Dirt, grime, and mildew can all affect how well the paint adheres to the vinyl. Start by using a garden hose to rinse off loose dirt.
Then, mix a solution of mild detergent and water, and use a soft-bristle brush or sponge to scrub the fence. Be sure to rinse the fence well with clean water afterward to remove any soap residue. Allow the fence to dry completely before moving on to the next step.
Repairing Damages
Once the fence is clean, inspect it for any damages that need to be repaired. Look for cracks, holes, or any loose pieces that might affect the smoothness of the paint finish. Small cracks and holes can be filled with vinyl patching compound, which can be found at most hardware stores.
Simply apply the compound according to the manufacturer’s instructions and sand down any excess once it is dry. If there are larger sections of damage, you may need to replace those parts of the fence before painting.
Choosing the Right Paint
Selecting the appropriate paint for your vinyl fence is essential for achieving a durable and long-lasting finish. Not all paints are suitable for vinyl, so look specifically for paints labeled as suitable for plastic or vinyl surfaces. Acrylic latex paint is generally a good choice for painting vinyl fences, as it provides a strong bond and is flexible enough to withstand varying weather conditions.
Additionally, consider selecting a primer designed for vinyl surfaces, as it will help the paint adhere better and last longer. Make sure to pick a color that complements your home and landscaping for the best aesthetic results.
Step-by-Step Guide to Painting
Gathering Necessary Tools and Materials
Before you start painting your vinyl fence, it’s crucial to gather all the necessary tools and materials. You will need:
- Vinyl-specific primer
- High-quality exterior paint designed for vinyl
- Paint brushes and rollers
- Painter’s tape
- Drop cloths or plastic sheeting
- Cleaning solutions such as mild soap and water
- Sandpaper (medium to fine grit)
- Protective gear like gloves and safety glasses
Having these items on hand will ensure you can proceed without any interruptions.
Preparing the Work Area
Preparation is key to achieving a flawlessly painted vinyl fence. Begin by thoroughly cleaning the fence with a mild soap and water solution to remove any dirt, grime, or mildew. Rinse the fence thoroughly and allow it to dry completely.
Next, use sandpaper to lightly sand the surface of the vinyl to help the primer adhere better. Finally, lay down drop cloths or plastic sheeting beneath the fence to protect the surrounding area from potential drips or spills.
Applying Primer
Once your fence is clean and dry, it’s time to apply a vinyl-specific primer. This step is vital as it ensures the paint will stick to the vinyl without peeling.
Use a brush or roller to apply the primer evenly across the fence, making sure to cover all surfaces. Allow the primer to dry as per the manufacturer’s instructions before moving on to the painting stage.
Applying Paint
After the primer has dried, it’s time to apply the high-quality exterior paint. Like the primer, you can use either brushes or rollers depending on the size and shape of the fence sections. Apply the paint in even, consistent strokes, ensuring full coverage.
Techniques for Even Coating
Lastly, to achieve a smooth and even coating, follow these techniques:
- Apply multiple thin layers rather than one thick layer to prevent drips and uneven texture.
- Paint in one direction with each coat – from top to bottom or side to side.
- Use long, steady strokes and maintain a wet edge to avoid visible brush or roller marks.
- Allow each layer to dry completely before applying the next coat, as per the paint manufacturer’s instructions.
Curing and Drying Process
Understanding the curing and drying process is essential for achieving a long-lasting and aesthetically pleasing paint job on vinyl fencing. This phase ensures that the paint adheres properly and withstands environmental elements over time.
Curing time refers to the period it takes for the paint to fully harden and achieve its maximum durability. Unlike drying, which occurs on the surface relatively quickly, curing can take several days to a few weeks depending on the type of paint and environmental conditions.
During this period, the paint undergoes chemical changes that enhance its resilience and adhesion to the vinyl surface.
To ensure proper drying conditions, it is crucial to paint under the right weather conditions. Optimal conditions include low humidity, mild temperatures, and minimal wind.
Additionally, you should avoid painting in direct sunlight as it can cause the paint to dry too quickly, resulting in cracks and uneven coverage. Providing these ideal circumstances will facilitate a smoother drying process and contribute to a durable, high-quality finish.
Maintenance Tips for Painted Vinyl Fences
Cleaning and Maintenance Schedule
To keep your painted vinyl fence looking pristine, regular cleaning is essential. Aim to clean the fence at least twice a year using a mild detergent mixed with water. A soft brush or cloth can be used to gently scrub away any dirt or grime.
For more stubborn stains, a solution of vinegar and water can be particularly effective. Always rinse thoroughly with water to ensure no residue remains on the surface.
Touch-Up Procedures
Despite the durable nature of painted vinyl, occasional touch-ups might be necessary to maintain its appearance. If you notice any chips or scratches in the paint, use a high-quality acrylic paint that matches the original color.
Clean the damaged area thoroughly, lightly sand it to ensure paint adhesion, and then apply a coat of paint using a small brush. Allow it to dry completely before applying a second coat, if needed.
Longevity of Painted Vinyl Fences
With proper maintenance, painted vinyl fences can last for many years. The key to longevity is consistent care and prompt attention to any signs of wear. Regular cleaning prevents the buildup of dirt and mildew, while timely touch-ups prevent minor damages from becoming major issues.
By following these maintenance tips, you can enjoy a beautiful and long-lasting vinyl fence for up to two decades.
Common Mistakes to Avoid
Skipping Surface Preparation
One of the most common mistakes when painting vinyl fencing is skipping surface preparation. Properly preparing the surface ensures that the paint adheres correctly and lasts longer. This involves cleaning the fence thoroughly to remove dirt, mildew, and other contaminants.
Additionally, sanding the surface lightly can help the paint bond better with the vinyl. Failing to take these steps can result in a patchy, uneven finish that may peel or chip over time.
Using the Wrong Type of Paint
Another frequent error is using the wrong type of paint. Not all paints are suitable for vinyl surfaces; using the incorrect paint can lead to disappointing results.
It’s crucial to choose a paint specifically formulated for use on vinyl, as these contain special ingredients that provide better adhesion and flexibility. Using a paint not designed for vinyl can result in cracking, blistering, or peeling, which compromises both the appearance and durability of the fence.
Neglecting Maintenance
Neglecting maintenance after the painting process is a mistake that can shorten the life of your newly painted fence. Regular maintenance, such as cleaning the fence with mild soap and water, can help preserve the paint job.
Periodically inspecting the fence for signs of wear and tear allows you to address any issues before they become major problems. Without proper upkeep, the painted surface can degrade more quickly, requiring more frequent repaints or repairs.
Conclusion
Painting a vinyl fence can be a cost-effective and rewarding way to enhance your outdoor space. While the process requires careful preparation and the right materials, the end result can significantly boost your property’s curb appeal.
By following the key points outlined in this guide, even beginners can achieve a professional-looking finish. Whether you’re looking to refresh an aging fence or simply change its color to better match your aesthetic, painting your vinyl fence is a DIY project worth considering.